
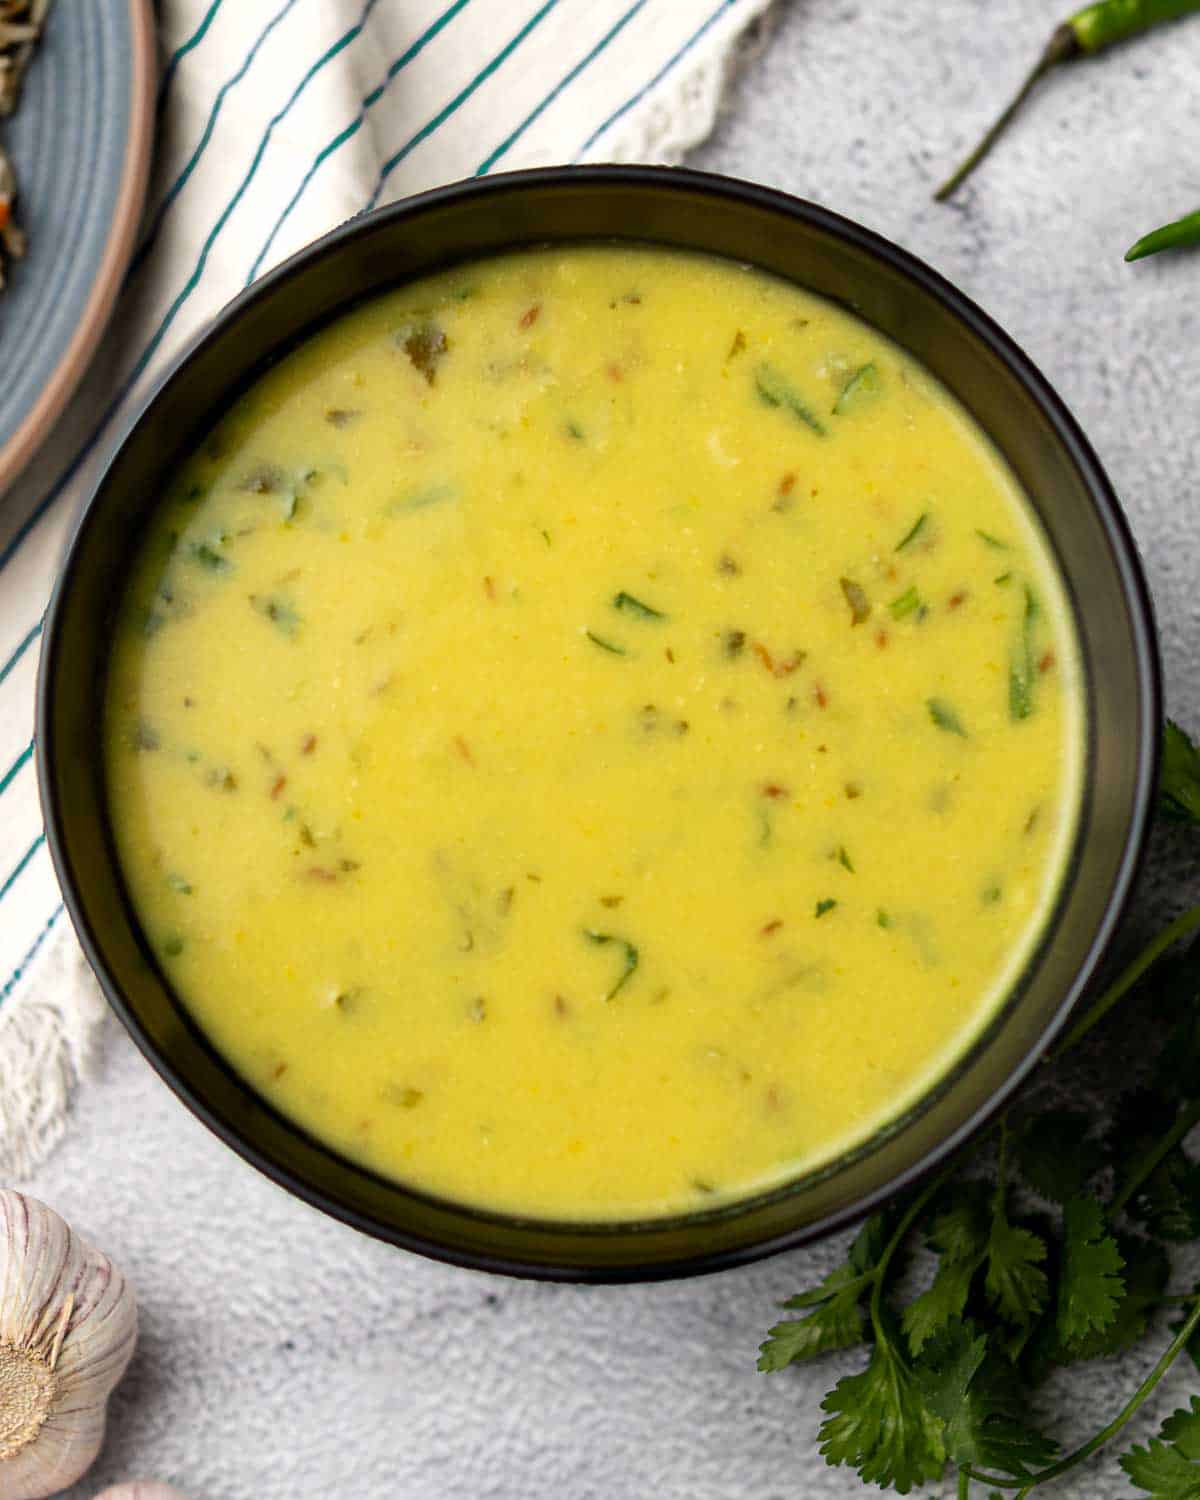
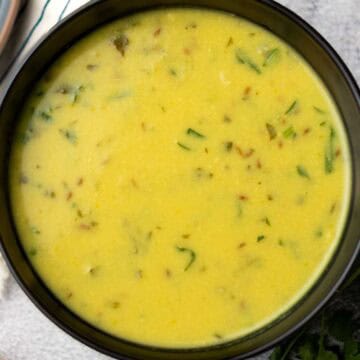
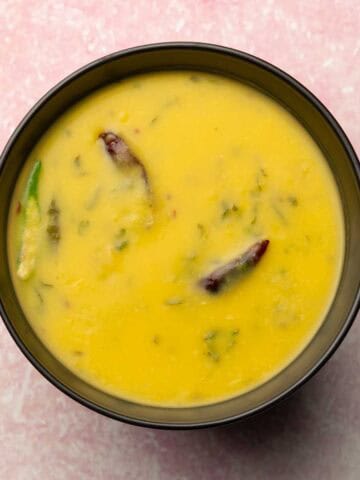
This recipe uses urad dal in its husked and split form, which is white-colored. The cooking method gives the dal a creamy, loose consistency that pairs wonderfully with both rice and roti. And it makes for an economical meal that makes taste buds and wallet sing with joy.
Until a couple years ago, the only Pakistani-style maash/urad dal I'd made or tried was the drier kind, like shukhi or bhuni dal. And I’ve got a really nice dhaba-style recipe for it that I’ve been using for years.
I just never thought of preparing it in a more liquid form, and didn't know what I was missing until a very dear friend, Zunera, put me on to it.
The first time I tried it was at her place. I wasn't hungry, and so I helped myself to a small portion. Then I went back for seconds. And then thirds. Ahem! Turns out a full stomach suddenly develops very flexible boundaries when food is this good 😁
Of course, I had to ask for the recipe, and she, being the awesome person she is, didn’t gatekeep. Big shoutout to her mom too, for this recipe is actually hers.
Speaking of the recipe, you'll notice it has a longer-than-usual pressure cooking time. Urad/maash daal is a bit stubborn and doesn't cook as quickly as some of the other lentils, especially if you want a loose consistency.
I made a couple of tweaks to the original recipe, kept all the same ingredients, just added a simple tarka. If you'd like to make the full original version, see the notes in the next section.
Now go, make this dal, you'll be so glad you did. Oh, and if you're a daal chawal enthusiast looking for more recipes that pair great with rice, try my moong and toor dal, or this simple moong version.
Pre-cooking notes and tips
- Zunera's original recipe has no tarka. The cumin (whole or ground) goes into the pressure cooker along with salt and turmeric. Sugar, also, is my own addition. I add it to any dal that doesn't have onion. Onions, when caramelized, add some sweetness, and sugar fills that role here. That said, the original recipe is superb, and my tweaks are by no means necessary for a good outcome.
- At high-altitude locations, like where I live, cooking lentils and beans on the stovetop can take a long time. And the hard water we have here piles onto the problem, so I always use an Instant Pot. Doesn't mean you have to, but I can't give you an estimate of how long it will take to cook this recipe on a burner.
- Older dal will not cook to a soft, creamy texture. When buying, check the "packed on" date on the package. Ideally, it should be within the past year. If there's a best-before date instead, look for packs that have more than a year of shelf life left.
- Soak the dal overnight if you can, the texture improves. If not, 30 mins should be just fine. With the long pressure cooking time, the odds of it coming out uncooked are slim.
- When I get to the step where water's added to reach the desired consistency, I usually add at least two more cups. The dal gets thicker as it sits, more so when refrigerated, just something to consider. You can thin it out even more and enjoy it as a soup. Adjust the salt accordingly, and maybe add some black pepper to spruce up the taste if you dilute it a lot.
- The consistency of dal after pressure cooking should be mashable, but again, it could come out more or less cooked depending on the factors I mentioned earlier. If you want it to be smoother, use a potato masher, an immersion blender, or a countertop blender. When using the latter, make sure you let the dal cool down, unless confident that your blender can handle hot food.
- The starch and protein in dal can cause the liquid to spit out of the valve of the Instant Pot during cooking and pressure release. I add ghee or oil before cooking, and it seems to help. The spitting can also happen if you don’t leave enough headspace in the cooker. Most Instant Pot inserts have a line etched into the side labeled “½.” Do not let the combination of dried lentils and water go above this line. Just to be safer, I keep the level even lower than that.
- I've also tried a couple other additions in the past. Just to switch things up. Added chicken cube once, a couple of teaspoons of kasuri methi another time. Both worked out well.
- White urad dal may be labeled under a different name depending on your region. White lentils, split washed urad dal, dhuli urad dal, skinless split black lentil, maa(h) dal, white urid dal, maash dal, huskless-split black mapte beans. Phew! What you are looking for is a small white (or creamy-white) lentil that doesn't have any black skin on it. And is split, not whole and rounded like a bean.
- Oh, and don't get confused by how dal is spelled on the package. Daal, dhal, dahl, same thing, potato, potahto.
- I use Thai green chilies, but you can swap in other kinds, and adjust quantity to suit your preference.
Serving ideas
I am a dal chawal fan, so basmati rice is obviously my first choice of pairing. Flatbreads like roti, naan, and chapati also make for nice, traditional options. Kachumber (a mix of diced onion, tomato, cilantro, lime, and salt) is a must for me.
You can also enjoy this dal as a second main alongside a curry, a less saucy meat dish, or rice meals. Some papad and achar on the side are nice extras.
And that's a wrap!
Like Hiba's chicken shorba, this dish is special for me. I am blessed with kind-hearted, generous friends, and so glad I get to share their recipes. If you give this one a try, I’d love to hear how it turned out in your kitchen.
Happy cooking ~ Nelo
Urad Dal (Maash Ki Dal)
Ingredients
- 1 cup (200 g) urad dal - aka maash dal - washed, soaked 30 mins, then drained (Note A)
- 3 cloves garlic - peeled
- 1 inch piece of ginger - peeled
- 10 sprigs cilantro - aka coriander/dhaniya
- 2 small green chillies - I use Thai/Birds eye chilies (Note B)
- 2 tablespoons ghee - or cooking oil
- 1 teaspoon salt - white/table salt
- ½ teaspoon turmeric powder - aka haldi
- ¾ cup (180 g) yogurt - whisked until smooth
- 1 teaspoon sugar - for well-rounded flavor
For Tarka
- 3 tablespoons ghee - or cooking oil
- 2 teaspoons cumin seeds - aka sabut zeera
- 4 cloves garlic - finely chopped
- 1 small green chilli - finely chopped
Final additions
- 4 tablespoons finely chopped cilantro - aka coriander/dhaniya
- 2 tablespoons fresh lemon juice
Instructions
- In a blender or food processor, put garlic cloves, ginger, cilantro sprigs, green chilies and ½ cup water and process until completely smooth. Set aside.
- Add the soaked and drained urad/maash dal to an Instant Pot/electric pressure cooker or stovetop pressure cooker. Add 3 cups of water and bring to a boil (I use 'high' saute mode). Wait for the scum to rise, then skim it off.
- Add the blended mixture you prepared earlier. Also add ghee, salt, and turmeric powder. Mix well, lock the lid.
- If using Instant Pot, select Manual (high pressure) and set the cook time to 35 minutes. If using stovetop pressure cooker, heat over medium-high (or medium if your burner is strong) until full pressure is reached. Reduce the heat just enough to maintain pressure, then begin timing 35 minutes.
- After cooking, turn off the heat/device, let the pressure release naturally. Stir the dal for a couple of minutes. If you prefer a smoother consistency, use an immersion/hand blender (see tips in Note C below).
- Set the Instant Pot to (less/low) saute mode. Mix in yogurt, 1 cup water and 1 teaspoon sugar. Then, gradually add in more water, if you like, until the dal reaches your desired consistency. Stir every few minutes so the daal doesn’t stick to the base of the pot. Meanwhile, get the tarka ready.
- For tarka, heat ghee in a small pan/pot over medium-low heat. Once hot, add cumin seeds, chopped garlic, chopped green chilies, and let them sizzle for 10 to 15 seconds. Don't let the garlic burn.
- Pour this tempered mixture over dal and stir to combine. Depending on the amount of extra water you've added, you may need to add a bit more salt. Taste the dal, and adjust if needed.
- Finally, mix in cilantro and lemon juice. Turn off heat/device. Cover and let the dal rest for 10 minutes so the flavors get better infused. Serve with steamed basmati rice, roti, or naan.
Leave a Comment